Teenage Mutant Ninja Turtles Drawing
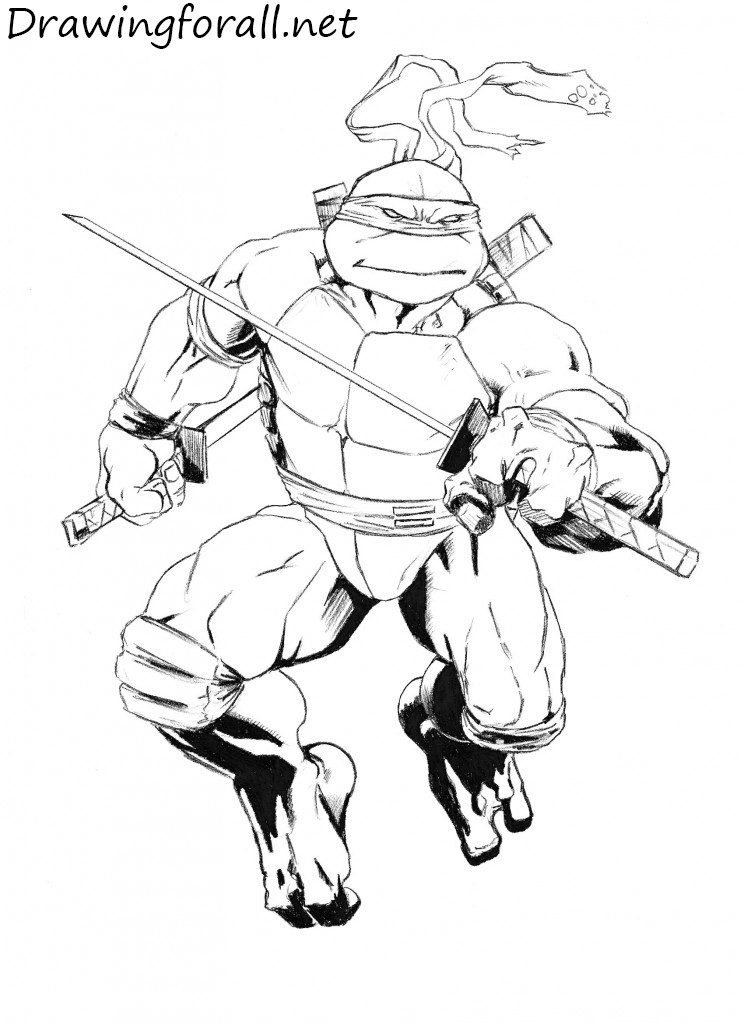
Hello! In this drawing lesson we will show you how to draw one of the team members of "Teenage Mutant Ninja Turtles". In this tutorial, we will draw a team leader – Leonardo. We must say, we have long thought, who will be the first turtle on our website, as each turtle has its own unique character – Rafael was always a joker and a swindler, Donatello – inventor and scientific center of the team, Leonardo is the undisputed leader, and Michelangelo – the good guy and the most important pizza connoisseur. As you can see, we have decided to start with Leonardo – partly because he is the major after Splinter. We will draw a complex and detailed version of Leonardo. So, let's start the drawing lesson and learn how to draw Leonardo from Teenage Mutant Ninja Turtles!
Step 1
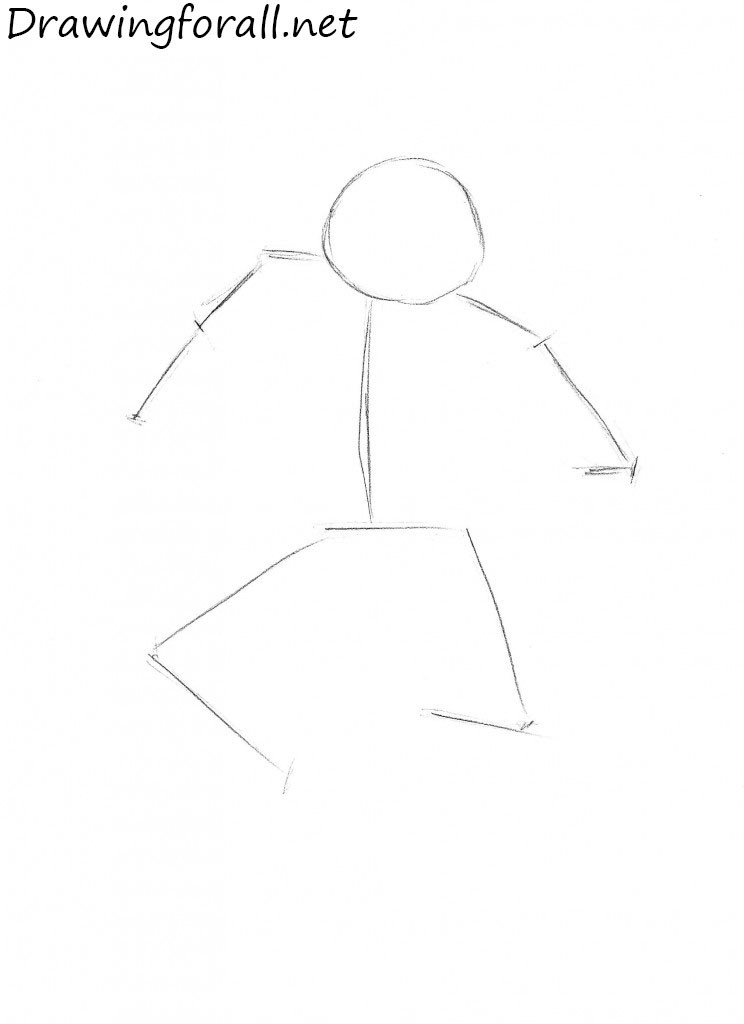
Let's start with a stickman. The body of our Leonardo is not quite standard – his head is bigger than human's head (and also has another, more flattened shape), and the proportions are typical for a strong, stocky man with a very low growth.
Another feature of the picture – pose of the character. Note that the pose of Leonardo, in contrast to the posture of Superman and Batman from our previous drawing lessons, rather complicated.
Step 2
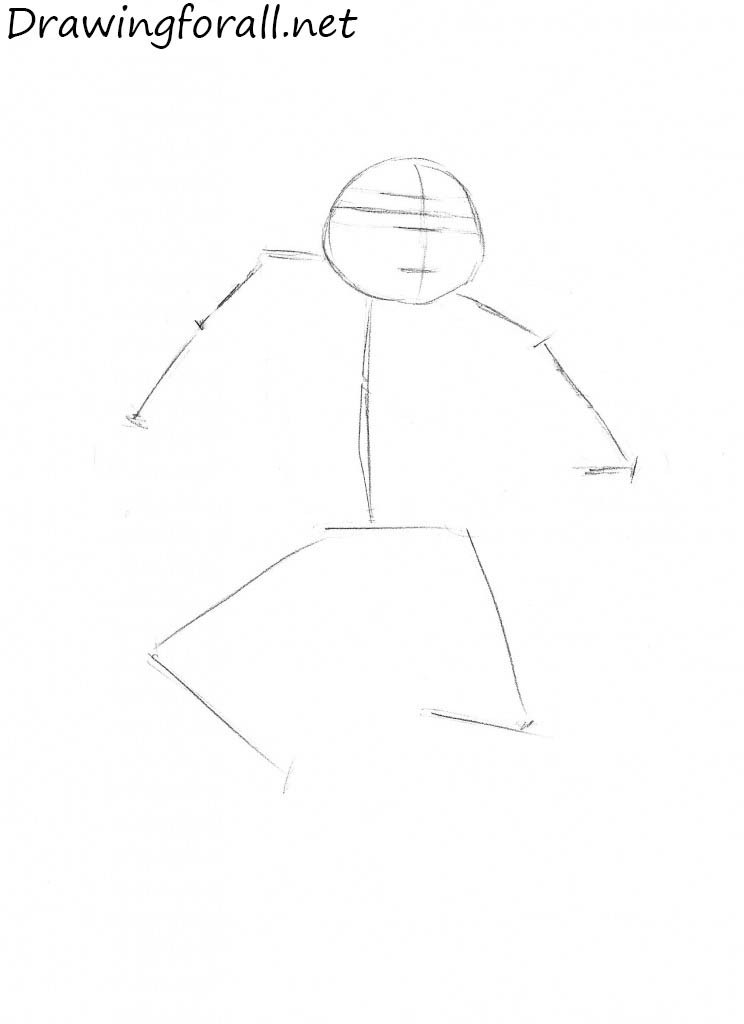
Mark the head of Leonardo. Draw a vertical line of symmetry of the face, and then outline the horizontal lines of the eye, bandages and mouth. Incidentally, the author of this text have never understood the meaning of masks that represent a bandage on the eyes – but the turtles, Zorro and Beagle Boys know better.
Step 3
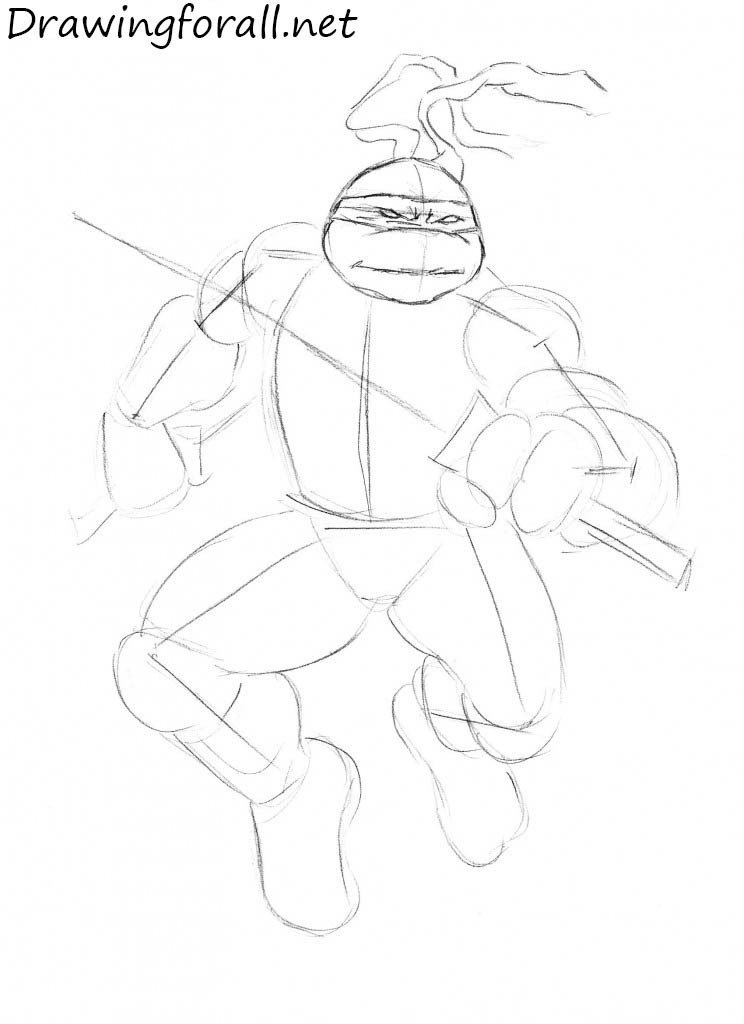
Now let us give volume to Leonardo. We outline the contours of the body and draw massive, bulky muscles of the arms – in fact, the whole hand of Leonardo in this perspective can be divided into 4 parts (top to bottom):
- Shoulder (the bulk of the shoulder – a powerful, ball-shaped deltoid muscle);
- Biceps (on the left hand from us we see only the biceps, and on the right we can see biceps and triceps);
- Forearm (
- Hand (with three fingers, similar to cylinders, on each hand);
Finish the step, drawing the outlines of the katana.

Step 4
Do the same actions, as in the previous step, but in the lower torso and legs. You will draw this step easier if you present the body parts in the form of geometric shapes:
- The groin – in the form of a triangle;
- Legs – in the form of cylinders;
- Knees in the shape of circles.

Step 5
The silhouette of Leonardo is ready, let's start adding details. Let's start with the head, gradually going down to the feet. So, face: the eyes, nose and mouth, as you can see, quite simple – they are, in fact, indicated by a pair of lines. Don't forget to add some folds to the mask of our ninja.
Step 6
This stage is very short – in it we draw the sheaths of swords, muscles of the neck and the upper part of the shell. From the left side of us also circle the upper part of the deltoid muscles of the shoulder. Draw many folds on the mask. Make the fluttering ends of the mask torn and tattered, this is a very important detail.

Step 7
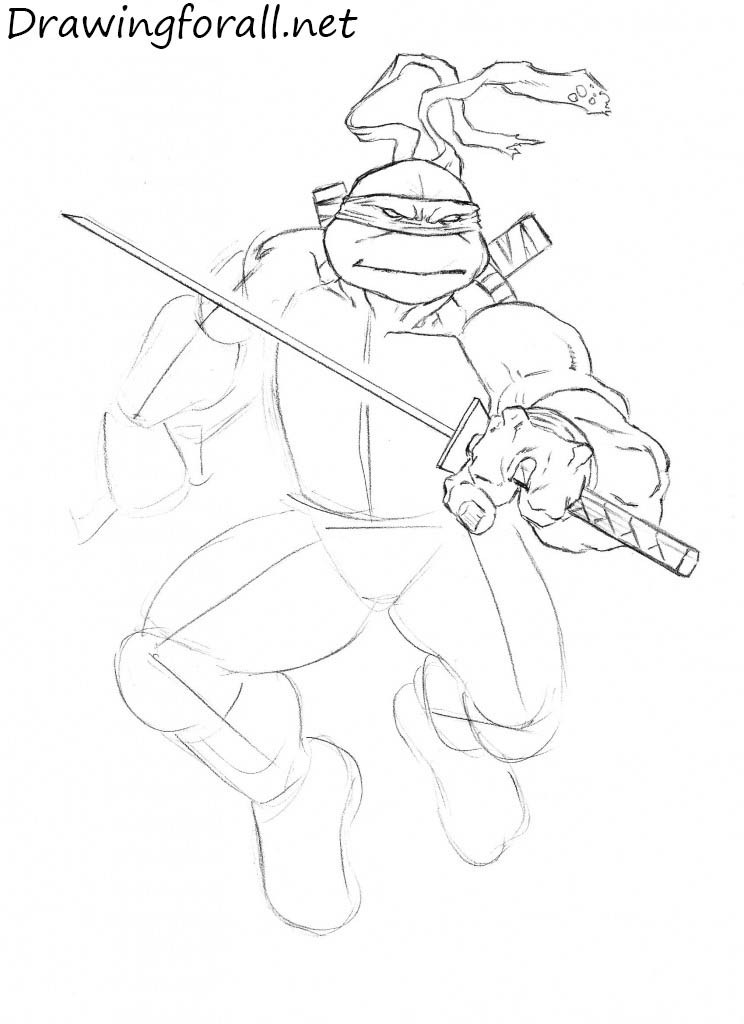
Draw the left hand of Leonardo. By and large, here you only need to carefully circle the muscles, delete the extra guidelines and add details. Pay attention to the muscles of the forearm – they are very tense, because the hand of Leonardo tightly compresses the hilt of his sword. Then draw the strap of fabric, which is located on the wrist. Then draw lines of the fingers and add details to the sword. Note, that there are many lines on the hands.
Step 8
In this very brief step we draw the torso. Relatively speaking, it is similar to the human front abdominal muscles, "blocks", but stretched over the entire space of the abdomen and chest.

Step 9
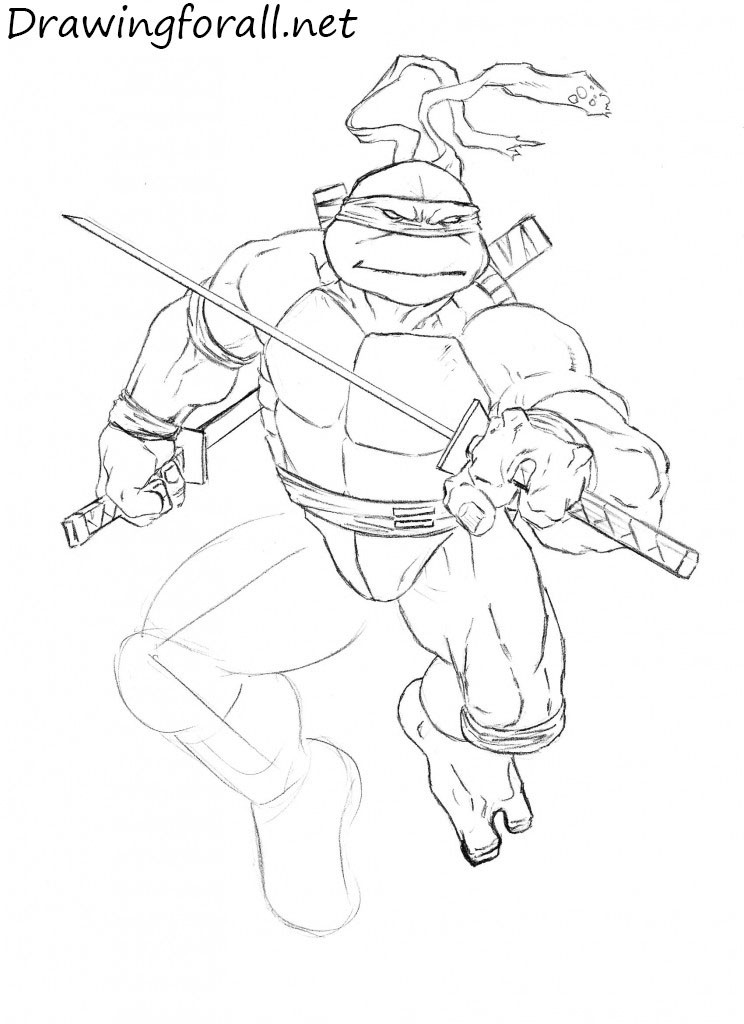
And now a little more complicated – draw the right hand. Outline contour of the biceps, the lines of the forearm and fingers gripping the hilt of the sword. In areas of the wrist and elbow draw bandages, and add in the appropriate places the fabric folds, as in our sample. Do not forget about the fingers – they are in the same position as the fingers of left hand, just a little bit different perspective. By the way, an important point – fingers of turtles should be thicker and heavier than the fingers of average person.

Step 10
Draw lower torso, waist and the left leg. Circle the leg and draw powerful thigh muscles, and to shape the calf muscles (because of the perspective it is presented in the shape of an oval). Then mark the couple of fingers on the foot and mark the tendon by the several lines. Draw a bandage on the knee area and add some folds as in our example. Draw the lower part of the torso in the shape of the triangular plate. Draw the belt, covered in folds of fabric.
Step 11
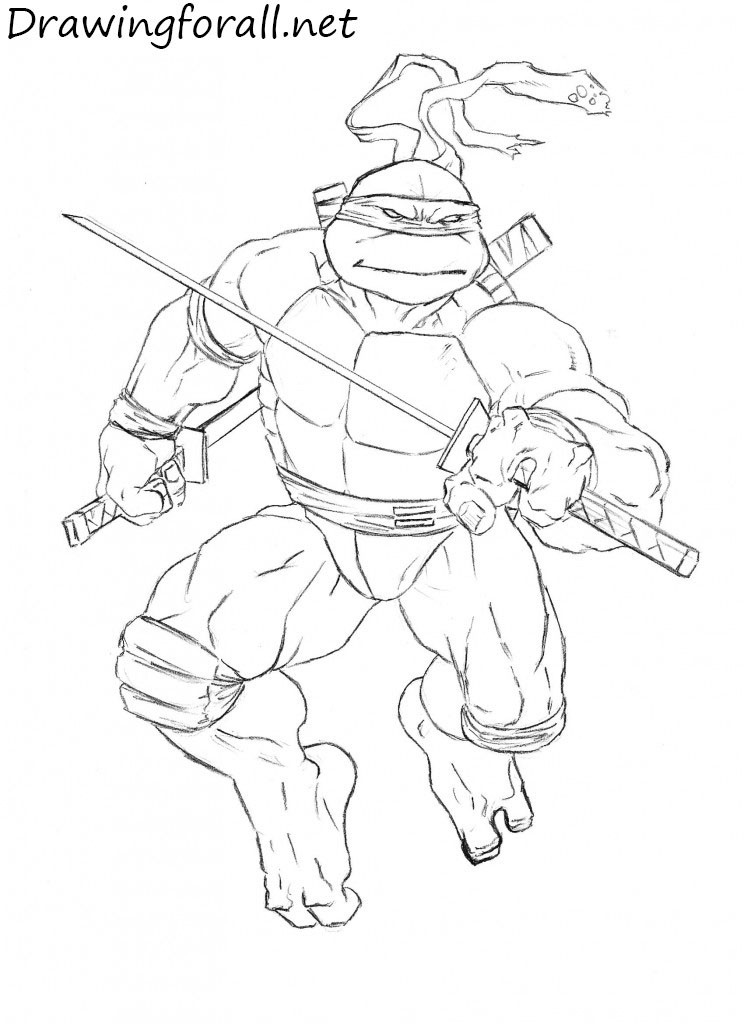
Repeat the same steps, only this time on the right leg of Leonardo. Note that here we see the inside of the thigh – as in the previous step, thigh muscles are very tense, so it is necessary to use clear confident lines. Also, we need to draw the calf muscles, unlike the previous step, we see them from the side. Drawing the foot, do not forget to mark the ankles, tendons and knuckles.
Step 12
Remained the last step – the imposition of shadows. Here we will use shadows in the style of comics – that is thick and coarse, imposed on large areas. Incidentally, these shadows is better to draw in two stages, first we draw the contours of the shadows and then paint the areas of shadows.

It was a drawing lesson devoted to how to draw Leonardo from Teenage Mutant Ninja Turtles, which was prepared for you by Drawingforall.net.
Teenage Mutant Ninja Turtles Drawing
Source: https://www.drawingforall.net/how-to-draw-leonardo-from-tmnt/
Posted by: maplethoposel.blogspot.com

0 Response to "Teenage Mutant Ninja Turtles Drawing"
Post a Comment